
Hi Guys, this project has been coming (in my mind) for a very long time, but today it finally arrived – thanks to some help from John Plocher.

This project is simply yet another LocoBuffer, but making it required me to overcome some challenges,which were:
- I wanted it to have a nice tidy USB interface as my ancient (original) LocoBuffer only has the Serial interface so I always had to use a USB to Serial adaptor and I didn’t want to just get a RR-Circuits LocoBuffer II – wheres the DIY fun in that.
- It needed to be robust and support native USB with data flow handshaking as there is one subtle issue with simply using an Arduino UNO as a LocoBuffer – it doesn’t support Serial Hardware Handshaking, which can be problematic and suffer serial data losses and overruns.
- It needed to be DIY and cheap and I wanted it to be nice and small and use SMD components.
Years ago the Arduino Team introduced the Arduino Leonardo which uses the ATMega32U4 chip. It supported native USB and that got me started started thinking along this path – many years ago. Since then a number of ATMega32U4 based Arduino variants have become available and I noticed one on eBay for only a few $, so I ordered some. They’re a clone of the Arduino Pro Micro.
John Plocher has build several Arduino LocoNet interface boards – which I have, so I asked him if he would consider designing a variant that would fit the Arduino Pro Micro footprint. He said yes and soon after that I had some samples of his Core-LocoBuffer 2.0 PCB.
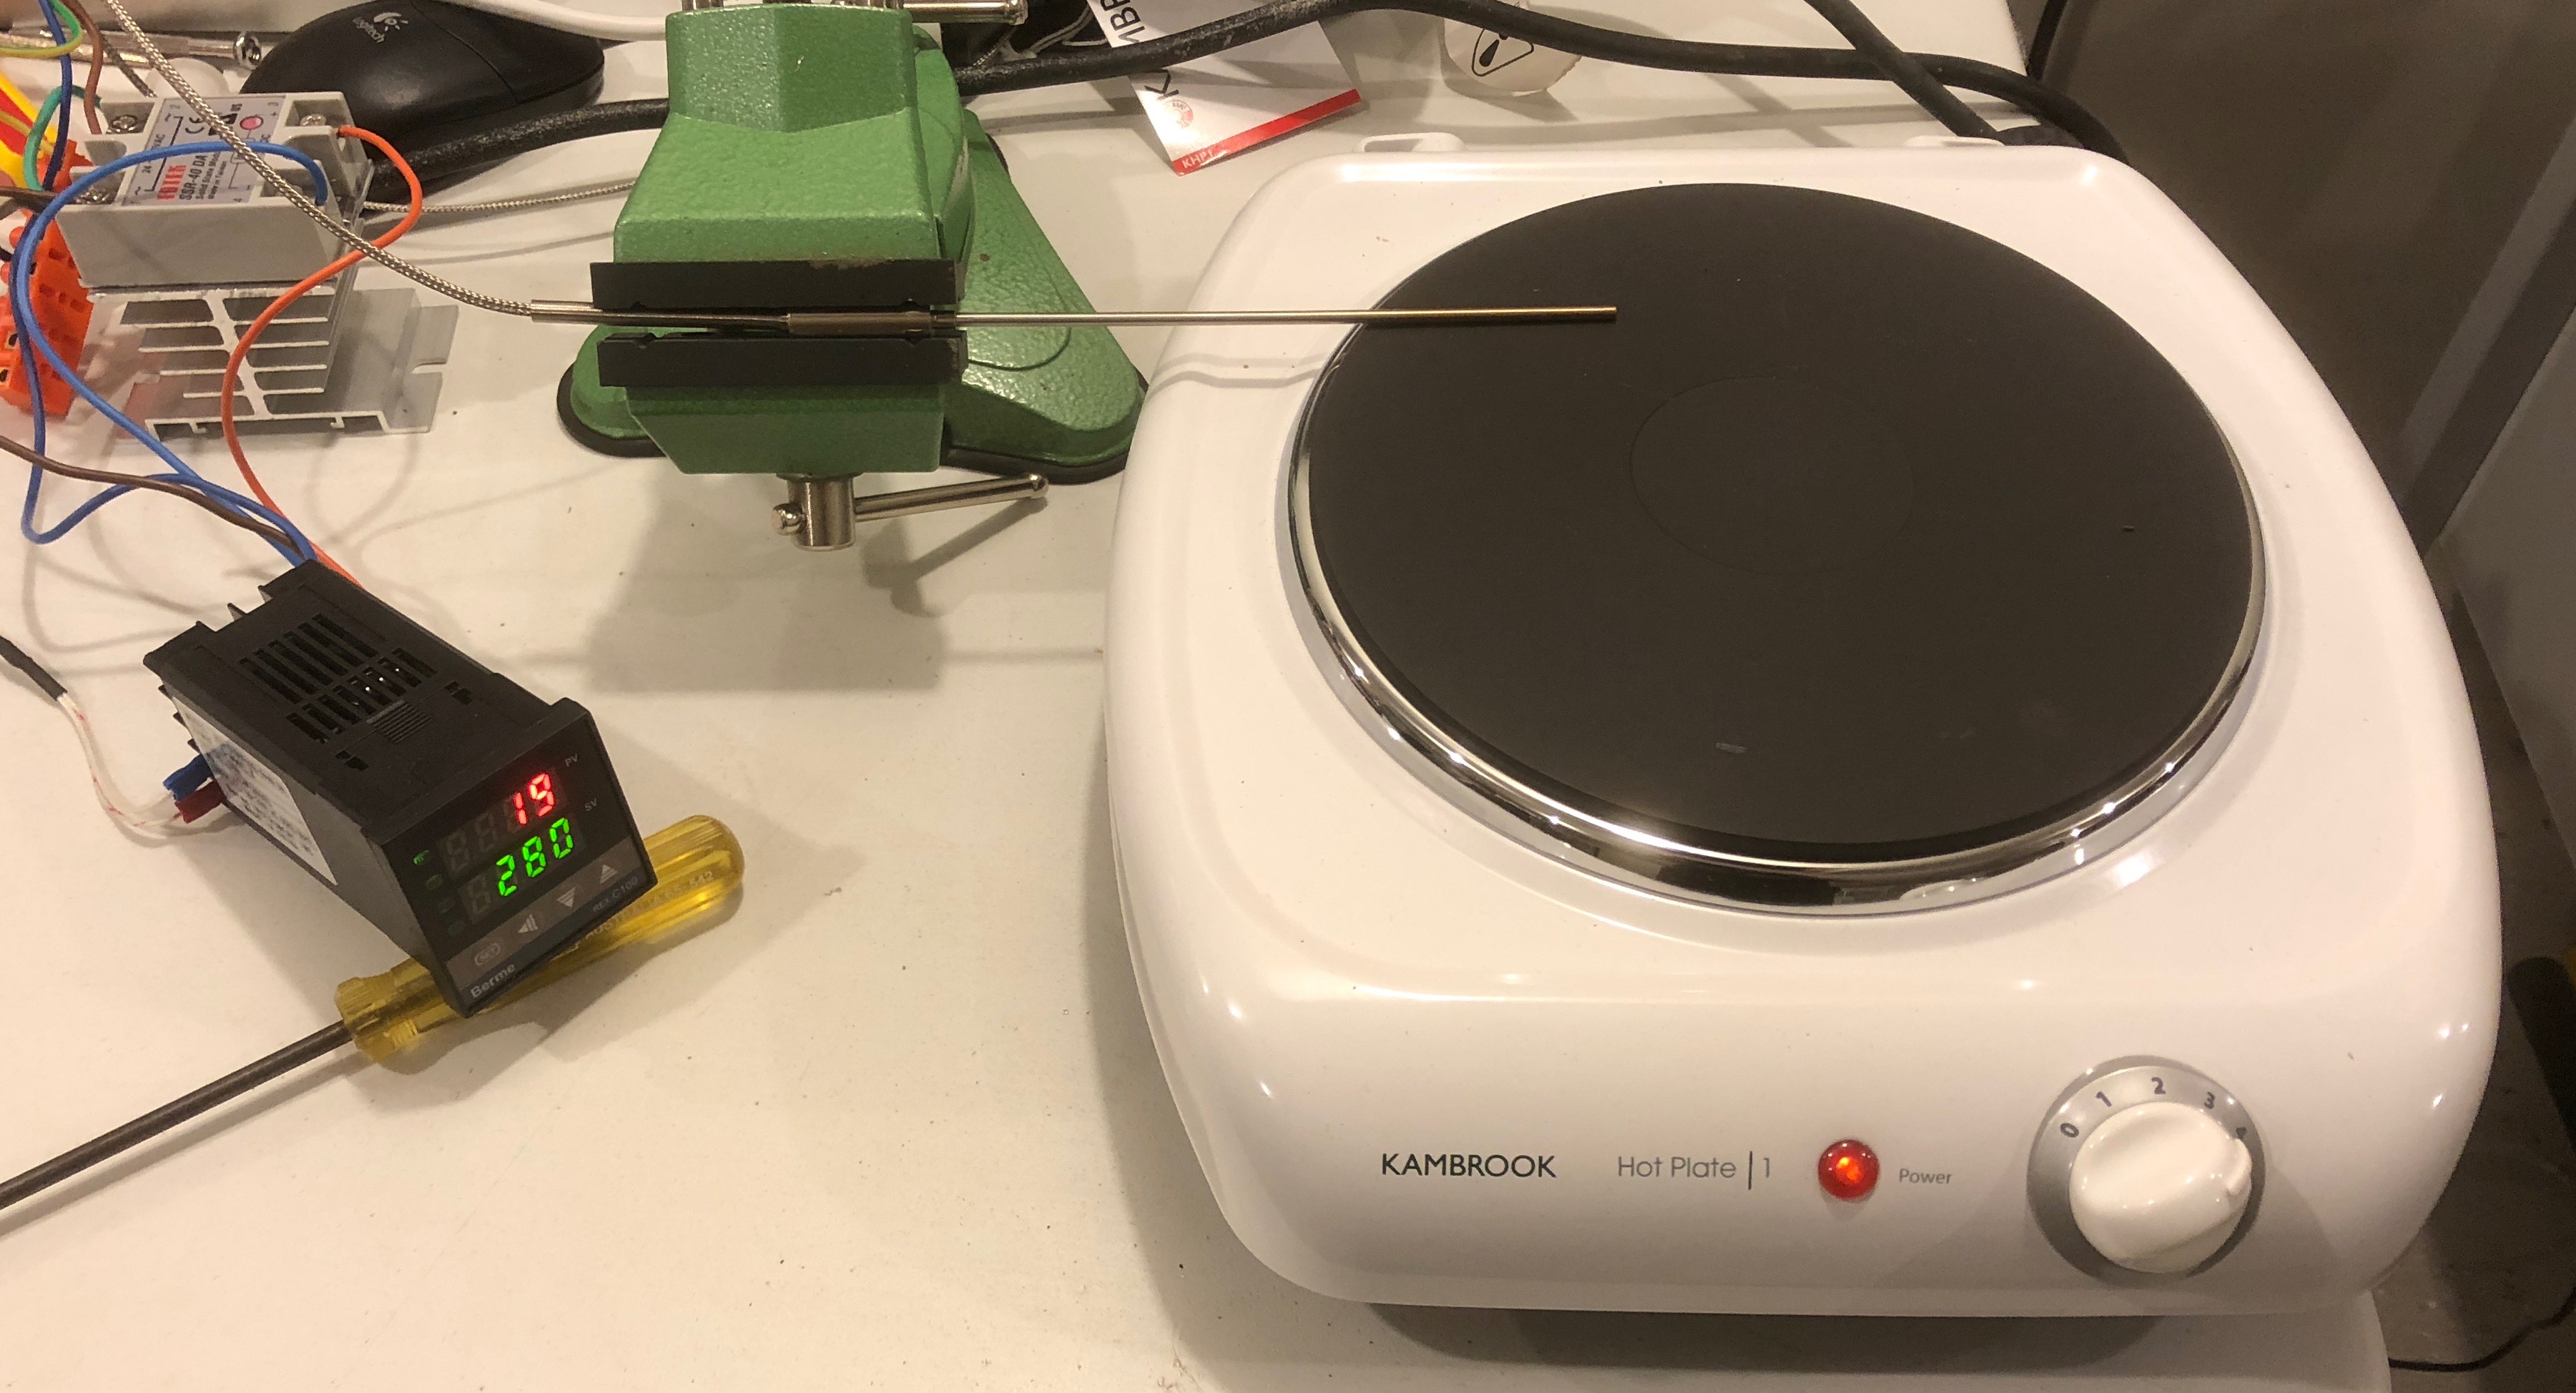
I ordered the SMD components and solder paste from eBay, which duly arrived, however, I really needed to get setup with assembling SMD boards. I’ve previously hand soldered SMD components onto small PCBs using a normal soldering iron, fine solder, solder wick, magnifier, tweezers and an awful lot of patience. However, this time I wanted to do it the “right way”.
I researched the SMD assembly options on the web and YouTube and finally chose the “hot plate” method. I ordered a cheap PID controller that can drive a Solid State Relay (SSR), a long thermocouple and a hefty SSR that can handle Mains Electricity (240VAC in NZ) at 20A, to drive the hot plate. I purchased a single hot plate off TradeMe (NZ auction site) and got it all setup and tested.
So finally, after many months (years actually) I managed to get some time and headspace to pull it all together and apply solder paste to the PCB, position the SMD components and finally solder them with the hot plate! The soldering with the hot plate was just awesome and worked “first time” which was a bit of a surprise actually. I had obviously over-thought it as it turned out to be “too easy”.
So then I loaded up the LocoLinx32U4 example Arduino LocoNet sketch which also “just worked” but I’d previously worked on that about 6 months ago using the Arduino Pro Micro clones from eBay and one of John’s other LocoNet shields, with some some wires connecting to the Pro Micro pins, so I knew that bit worked.
So then I connected up JMRI DecoderPro, configured the LocoNet interface to use the “LocoBuffer” System Connection (not the “LocoBuffer II” option, otherwise it won’t send any commands from the PC to the LocoNet) and that all worked fine as well.
I also managed to brick the Pro Micro boards along the way, but they are apparently recoverable if you follow this procedure however, I only found that out after I had spent ages figuring out how to reloaded the bootloader using my AVR ISP II.
So I guess now the next step is to make a nice little enclosure with the 3D printer.